Soldier Soap: {Part 2}
Here is Part 2 of the Soldier Soap Post that I promised you. I wanted to make a bar soap in addition to a liquid soap. See Part One here. To do this project, I started with this plastic rectangular mold. I do not recommend using this plastic mold. It was very difficult to work with when it came to removal of the completed bars. The silicone one I had ordered did not arrive on time.
I ordered some Hemp Melt & Pour Base from Brambleberry.
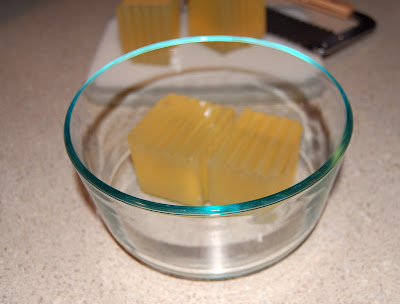
I cut the brick into smaller pieces for easier melting.
I put the pieces in a bowl and warmed the soap for about 90 seconds. Depending on how much you are heating up your time may vary. Just heat in 30 second increments and you should be safe.
I added some Grapefruit Essential Oil...
and a little bit of blue coloring to give it a green color (the soap was a yellowish-green originally).
Here is my soap with color and fragrance added.
I then poured the soap into each cavity fully and dropped the soldier face down in last. I tried doing a thin pour first, then adding my soldier and topping it off with more soap, but that didn't work as well as adding the soldier once the soap was fully poured.
Here are all three. I didn't use the fourth cavity because it was warped due to a previous project.
I let my soap set overnight. Most melt and pours are good within a few hours, but I wasn't in any hurry. As a bit of advice, only use the soap until the soldier starts to stick out. Then remove the soldier and use the remainder. It could totally scratch you if you aren't careful.
I put all of my soap and other elements into a type of gift set. I made a special little birthday card to go with it as well.
All done!
Links to the free-printables for blog subscribers (mine are printed on recycled paper) :
Linking this post to:


Fun gift! Thanks for sharing your tips.
ReplyDeleteGlad you like it!
DeleteI love this SO much and wish I had seen it before my twins' army party ... those would have made such great favors!
ReplyDeleteThey really are super simple to do too!
DeleteHi! Visiting from tt&j! Oh my these are so cute! What a fun idea for party favors! I love them :)
ReplyDeleteIm going to poke around your site a little more.. I would love for you to share this at my Friday link party! :)
Glad you like it! I will link it up soon.
DeleteThanks for linking up last week Natalia! Im featuring you tomorrow! Check it out and make sure ya grab a featured button :)
ReplyDeleteYay! That's awesome! Thanks for featuring me.
Delete